Flashing Your Keyboard With QMK Firmware
Preface
QMK has many features to explore, as well as reference documentation for you to explore. You can take advantage of many features by modifying the layout and key codes. You can also make your keyboard support VIAL and VIA by flash the firmware.
1.Get QMK Toolbox and QMK Firmware
1)Download QMK Firmware
(You can also download the VIAL Firmware and VIA Firmware by clicking here)
2)Download QMK Toolbox
(However, the Toolbox is currently only available for Windows and macOS. If you’re using Linux (or just wish to flash the firmware from the command line), skip to the Flash your Keyboard from the Command Line section.)
2.Install QMK Toolbox
1)Install the QMK Toolbox in any directory on your computer
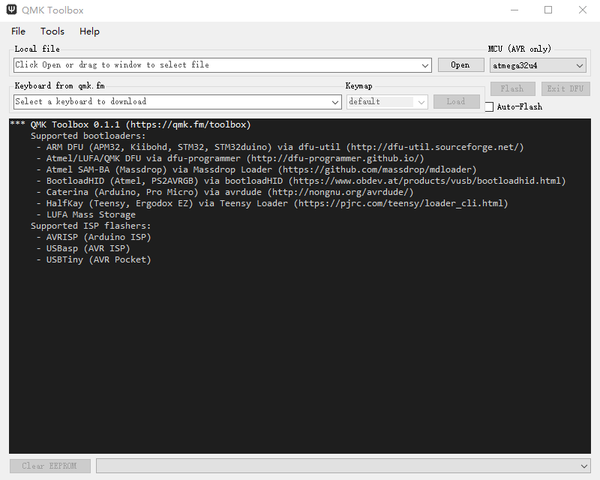
2)Open QMK Toolbox
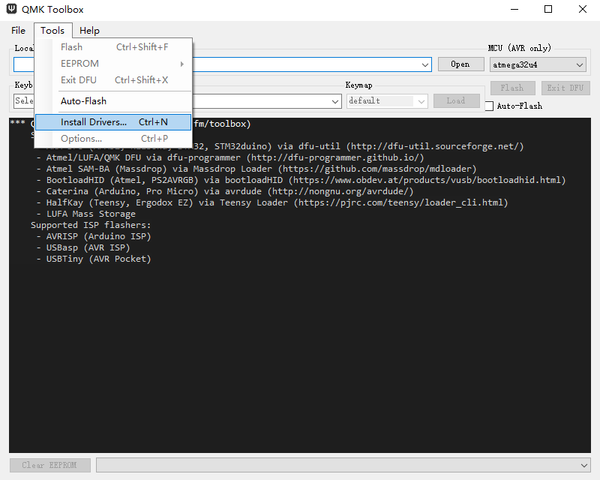
3)Click Tools in the menu bar and select Install Drivers
(When using the QMK Toolbox on Windows, it will prompt at first run to install the necessary drivers.)
3.Flashing Your Keyboard with QMK Toolbox
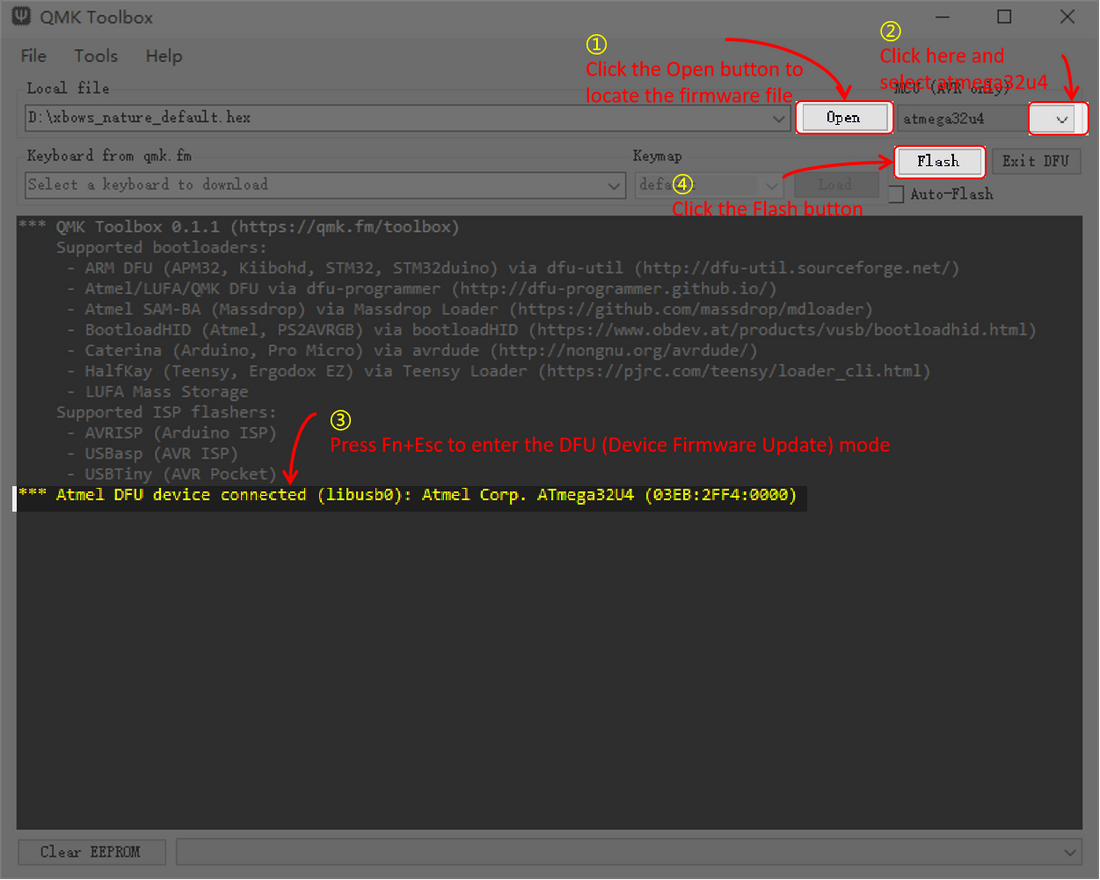
1)Click the Open button to locate the firmware file
2)Click on the MCU list and select atmega32u4
(If you are using any brand other than X-bows, please check with the brand to determine the MCU model you are using)
3)Put Your Keyboard into DFU (Bootloader) Mode
(In order to flash your custom firmware you must first put your keyboard into a special flashing mode. While it is in this mode you will not be able to type or otherwise use your keyboard. It is very important that you do not unplug the keyboard or otherwise interrupt the flashing process while the firmware is being written.There are three ways to put your keyboard into DFU (Bootloader) mode,and you can try the first one first.)
(If you update your keyboard with the wrong firmware, you can try a third method to get the keyboard into DFU mode again.)
4)When the "DFU device Connected" message is displayed, Click Flash
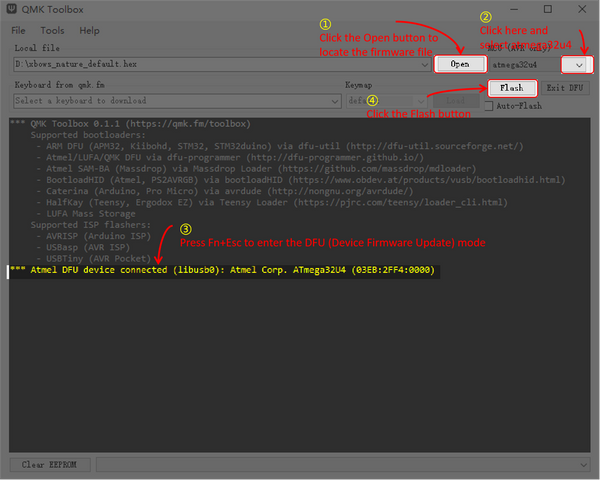
5)Click the Flash botton in QMK Toolbox. You will see output similar to the Following:
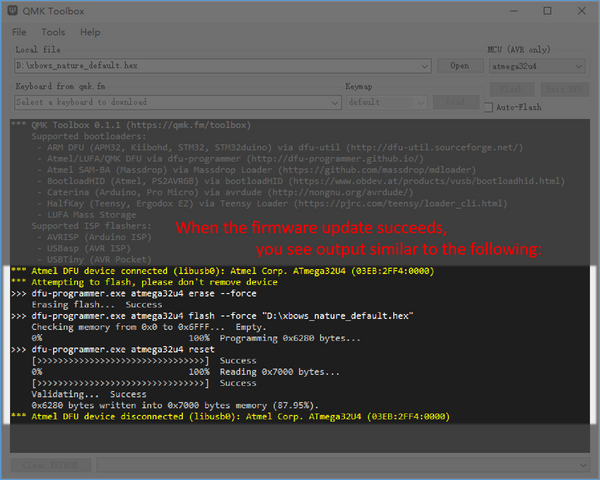
6)Congrats! Your custom firmware has been programmed to your keyboard and you’re ready to test it out!
4.Flash your Keyboard from the Command Line
1)Open terminal and go to the folder where the firmware is
2)Install dfu-programmer
#for arch-based linux such as Manjaro, sudo pacman -S dfu-programmer
#for debian linux such as Ubuntu, sudo apt install dfu-programmer
#for other distro,run the corresponding install command
sudo pacman -S dfu-programmer
3)Download some necessary files about QMK
Curl https://raw.githubusercontent.com/qmk/qmk_firmware/master/util/udev/50-qmk.rules -s -o 50-qmk.rules
sudo mv 50-qmk.rules /etc/udev/rules.d/
sudo udevadm control --reload-rules
sudo udevadm trigger
4)Put Your Keyboard into DFU (Bootloader) Mode
(In order to flash your custom firmware you must first put your keyboard into a special flashing mode. While it is in this mode you will not be able to type or otherwise use your keyboard. It is very important that you do not unplug the keyboard or otherwise interrupt the flashing process while the firmware is being written.There are three ways to put your keyboard into DFU (Bootloader) mode,and you can try the first one first.)
(If you update your keyboard with the wrong firmware, you can try a third method to get the keyboard into DFU mode again.)
5)Check whether the keyboard is in DFU mode
dfu-programmer atmega32u4 get
6)Flash firmware
dfu-programmer atmega32u4 erase --force
dfu-programmer atmega32u4 flash xbows_nature_vial.hex
dfu-programmer atmega32u4 reset
7)Congrats! Your custom firmware has been programmed to your keyboard and you’re ready to test it out!
Learn more:www.x-bows.com


2 comentarios
This is a great read. Unogeeks is the top Oracle Fusion HCM Training Institute, which provides the best Oracle Fusion HCM Training
Thanks for the informative article. Unogeeks is the top SAP FICO Training Institute, which provides the best SAP FICO Training